
Collector's Insight
Covering Dust Jackets with Non-Adhesive Plastic Film
A reversible, archival method for sleeving jackets in clear film — nothing sticky ever touches the paper.
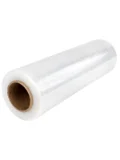
This is the fold-and-sleeve method: a length of inert covering film is folded into an open sleeve, the jacket slides inside, and the jacket's own flaps hold everything closed when it goes back on the book. Because no adhesive touches the jacket, the cover is fully reversible — it slips off years later without residue, cockling, or lifted printing. The technique rewards a little patience and a sharp, square first cut; the rest is folding and burnishing.
The one principle to keep in mind: the film wraps the jacket; the jacket wraps the book. Every fold you make in the film should mirror a fold the jacket already has, so the finished cover flexes exactly where the jacket does and lies flat everywhere else.
Tools & Materials
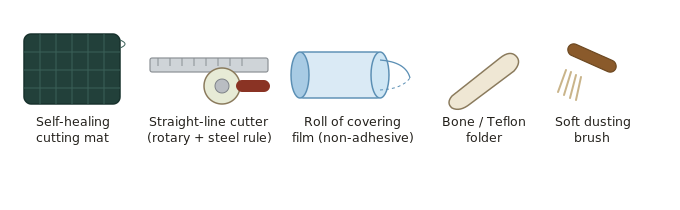
- Flexible self-healing cutting mat — A2 or larger is ideal; the open jacket is long. The printed grid gives you a square reference for cuts and for checking that ends are trimmed at a true right angle.
- A straight-line cutter — A rotary trimmer, or a steel rule paired with a sharp rotary or utility knife. The whole method depends on clean, straight, square cuts — freehand scissors will show every wobble against the shelf edge.
- A roll of non-adhesive covering film — Choose an inert film: polyester (BoPET — Melinex / Mylar) is the archival standard, with biaxially-oriented polypropylene a fine economical alternative. Around 75–100 micron holds a crease well while staying foldable. The roll's width must clear twice the book's height (see Step 1). Avoid PVC — its plasticisers migrate and can damage jackets over time.
- An edging tool (bone or Teflon folder) — For setting and reinforcing every fold. A Teflon folder is gentlest on the film's surface; a traditional bone folder gives a crisper crease. This is what turns a limp fold into a firm, self-holding edge.
- A soft brush & a clean bench — Dust the jacket and film before you start; trapped grit scratches from the inside for the life of the cover. A weight or two helps hold the film flat while you work.
Step 1 — Check the roll is wide enough
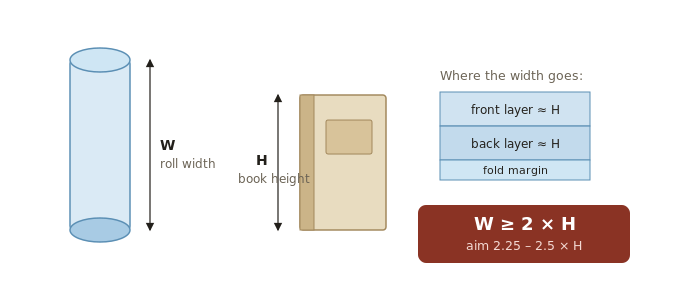
Measure the jacket's height, top to bottom — call it H. The film has to fold into a front layer and a back layer, both at least H tall, so the roll's width W must be at least 2 × H. Aim for 2.25–2.5 × H: the extra gives you a top crease that sits a hair proud of the jacket's edge and enough film at the bottom to fold up and enclose the tail. If the widest roll you own can't clear 2H for a tall folio, that title simply needs a wider roll — don't try to make a short sleeve stretch.
Step 2 — Remove the jacket and lay it out flat
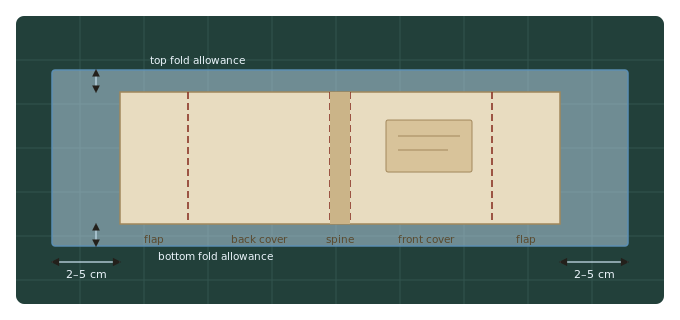
Slip the jacket off the book and lay it out fully open on the mat, printed side up, with the film beneath it. Cut the film to length as you go: the jacket's full open width plus a buffer of 2–5 cm at each end. Those end buffers become the returned edges that lock the cover on later, so don't trim them flush. Take a moment now to identify the jacket's four natural fold lines — the two spine hinges and the two flap folds — because those are the only places you will later crease the film.
Step 3 — Fold the top edge down and set the crease
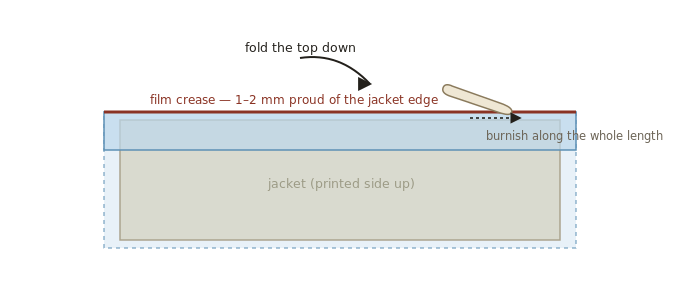
Bring the top edge of the film down over the jacket's top edge to form the head of the cover. Position it so the fold sits 1–2 mm proud of the jacket — you want the film's crease, not the paper, to meet the shelf. Then run your folder firmly along the whole length to set it. A well-burnished crease is what makes the sleeve hold its shape; a lazy fold springs back open. Work from the centre outward to chase out any air or ripples.
Step 4 — Insert the jacket and fold the tail up
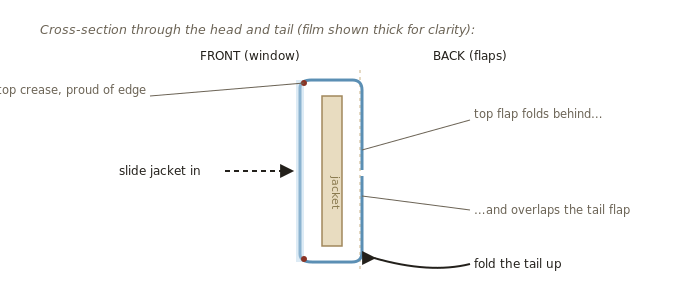
Seat the jacket's top edge fully into the crease you just made, printed face against the front layer of film — this front layer is the clear "window" you'll see through on the shelf. Now fold the remaining film at the bottom up behind the jacket and crease it, capturing the tail edge as well. The two folded flaps overlap behind the jacket; the result is a sleeve closed at head and tail, open at both ends, with the jacket floating loosely inside. Keep it relaxed — the jacket should be able to shift a millimetre or two. Film pulled drum-tight will bow the boards and cockle later.
Step 5 — Centre it, then crease the vertical hinge lines
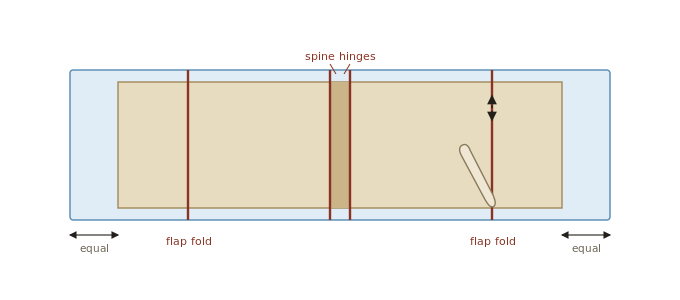
With the jacket sleeved, slide it side to side until the end buffers are equal, so the cover reads evenly at both flaps. Now the step that makes a covered jacket sit flat rather than gape at the corners: fold and burnish the film at each of the jacket's four vertical fold lines — the two spine hinges and the two flap folds — and only there. Line the film's fold up with the jacket's existing crease, press it in with the folder, and move to the next. These give the cover its hinges, so it opens and closes with the book instead of fighting it. A light, clean crease is enough; over-sharpening makes a hard ridge that stands proud.
Step 6 — Return the side buffers over the flap edges
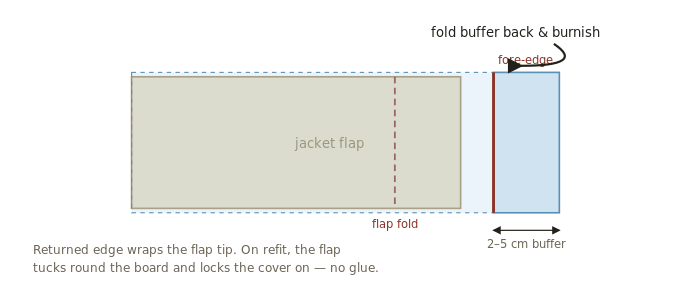
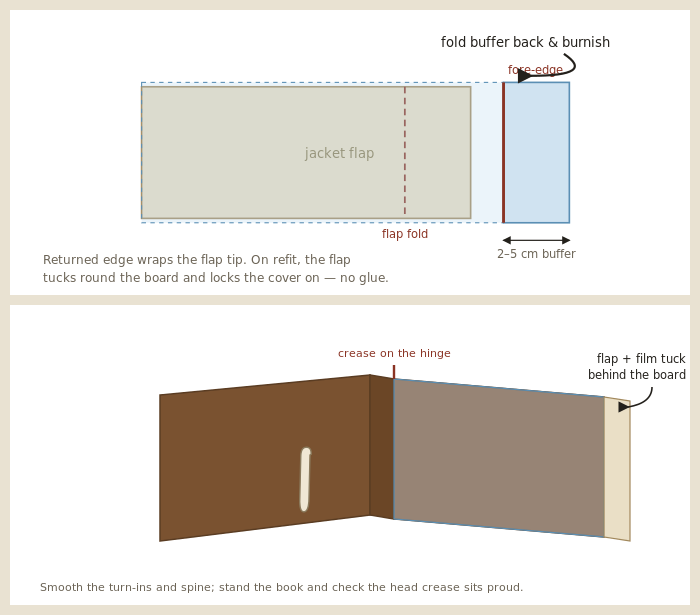
At each end, fold the 2–5 cm buffer back over the fore-edge of the jacket flap and burnish it down into a clean returned edge. This wraps and protects the vulnerable flap tips and, crucially, is what holds the whole cover together without a scrap of adhesive: when the jacket goes back on the book, the flap — now with film wrapped around it — tucks around the board and traps everything in place. If a flap is short, you can instead leave the buffer flat and let it tuck between the flap and the board on refit; the effect is the same.
Step 7 — Trim the ends square
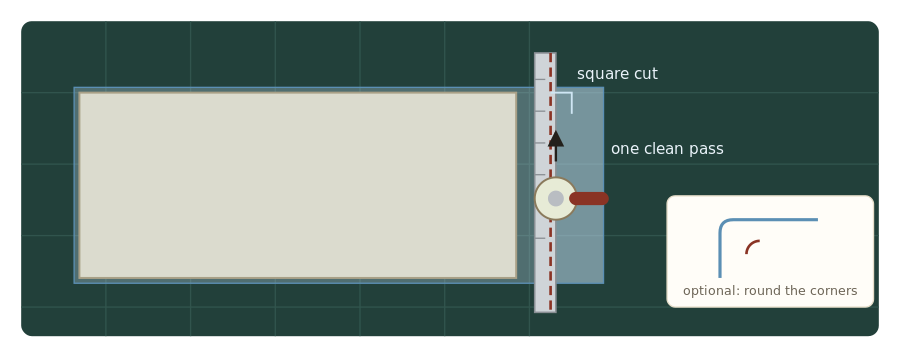
If you left the film long, tidy each end now against the steel rule and cutter on the mat, using the mat's grid to keep the cut at a true right angle and the buffers even. Cut in one confident pass rather than sawing. Many collectors round the film's outer corners very slightly at this stage so they can't catch and lift on the shelf. Never let the blade near the jacket itself — trim only the surplus film beyond the returned edges.
Step 8 — Refit the jacket to the book
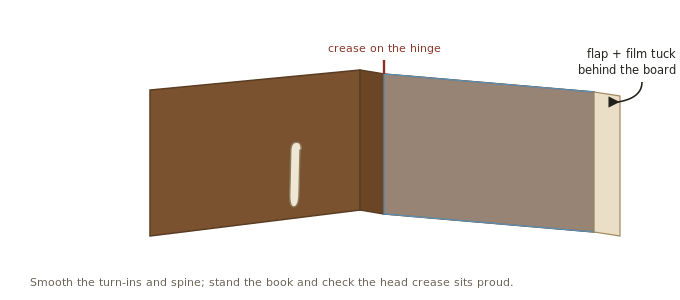
Lay the newly covered jacket printed-side down, set the book onto it spine-first, and wrap it back on exactly as it came off: front board into the front flap, then the back. The vertical creases you made in Step 5 should fall right on the board edges and the spine hinges, so the cover flexes with the boards and the flaps close snugly. Run the folder once around the turn-ins and along the spine to settle everything, then stand the book up and check the head: the film's crease — not the jacket — should be what meets the shelf. Done well, the cover is invisible at arm's length and comes off again whenever you wish, leaving the jacket exactly as it was.
Notes for a Clean Result
Do:
- Dust the jacket and film first — trapped grit scratches from the inside.
- Keep the film relaxed, not drum-tight, so boards don't bow.
- Leave the crease 1–2 mm proud at head and tail to take shelf wear.
- Burnish every fold; an unset crease is a cover that gapes.
- Handle film by the edges to keep fingerprints off the window.
Avoid:
- PVC film — plasticisers migrate and can haze or mark jackets.
- Creasing anywhere the jacket doesn't already fold.
- Trimming off the end buffers — they're what lock the cover on.
- Blades near the jacket; cut surplus film only.
- Forcing a tall book into a roll narrower than 2 × its height.
Fragile or price-clipped jackets: the sleeve supports the paper on all four edges, which is often kinder than leaving a brittle jacket bare. For very soft or chipped examples, a thin sheet of acid-free board cut to the jacket's height can be slipped behind it inside the sleeve for extra rigidity — still entirely adhesive-free and reversible.
Quick Reference — At the Bench
Sequence:
- Measure jacket height H; confirm roll width W ≥ 2H.
- Remove jacket, lay open on film; cut to width + buffer each end.
- Fold film's top edge down, 1–2 mm proud; burnish the crease.
- Insert jacket (printed face to the window); fold tail up and crease.
- Centre buffers; crease the 4 vertical lines (2 hinges, 2 flap folds).
- Return each side buffer over the flap fore-edge; burnish.
- Trim ends square on the mat; round corners if wanted.
- Refit spine-first; align creases to the board edges; smooth.
Disclaimer: Valuations are estimates based on recent secondary market activity and should be treated as guidance only. Market conditions change; always verify current prices with specialist dealers before buying or selling.
© 2026 thebook.buzz. Original content — all rights reserved. Reproduction without permission is prohibited.